Guide to Using the Registration Portal
The below guide will help you with the initial set-up of both the customer and student information. It will also provide a brief guide on how to request to join classes and view invoices once they are generated.
Use the arrows to navigate between steps.
Step 1
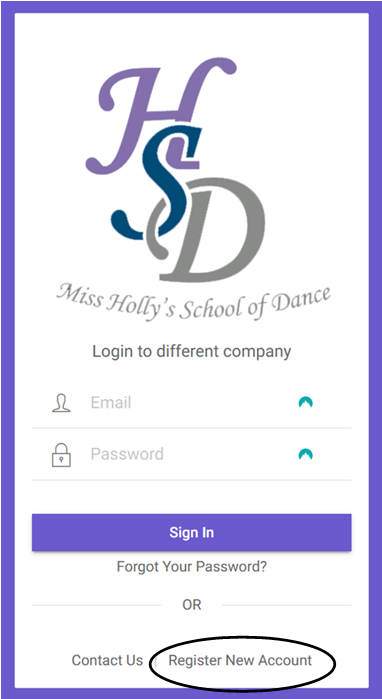
Start by selecting the “Register New Account” link
Step 2
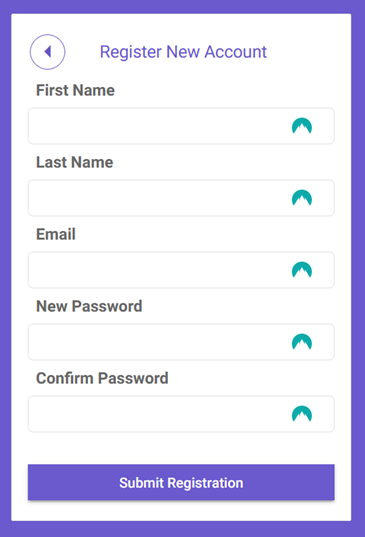
Provide your full details as required on the screen. Make a note of the password as you will need this going forward.
Step 3
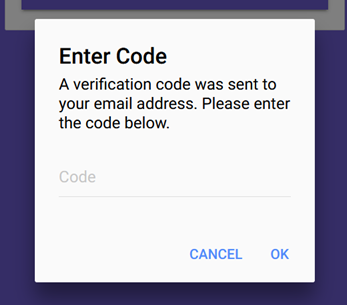
You will recieve a message via email with a verifcation code. Copy/Type this into relevant section and press OK.
Step 4
Read, sign and accept the Parent/Carer agreement.
Please note, any changes or updates to the agreement will require you to re-sign

Step 5
Complete the form in full, providing all the required details. Please provide as much information as possible as this would be required to ensure effecient communication.
You can update this information at any time once your account is created.

Step 6
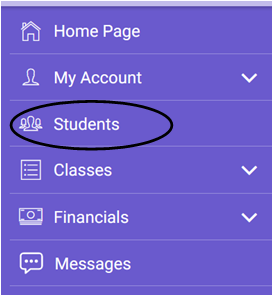
You will now be on the landing page with the menu available on the left hand side. From here, select students which will take you to the next window.
Step 7
In the top right of this screen is the “Add Student” button. Select this to add a student.
You will need to do this for each student you wish to book classes for.

Step 8
Complete the form and all the required sections

Step 9
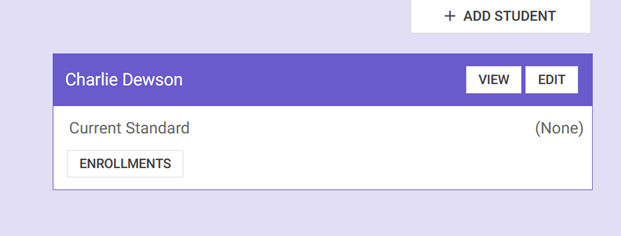
You will then be returned to the student page. From here you can add more students, view or edit current student details.
Step 10
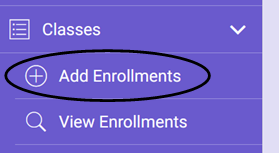
Once you have all the required students input, using the menu on the left select “Add Enrollments” from the “Classes” dropdown menu.
Step 11
In the top right you can select the student you wish to book classes for. These will need to be one at a time if you have multiple students.

Step 12
Find the class you wish to enter your child into and add it to the cart. You can also open the info button for further information, but the key information items are available on the timetable.

Step 13
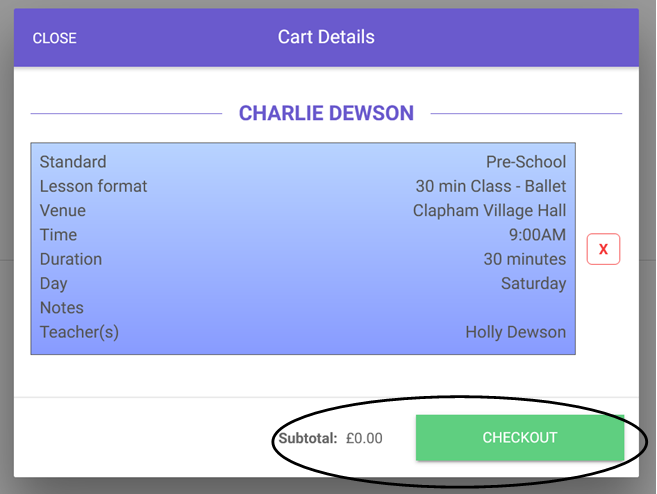
Once you have the classes you wish to enter the student into, press checkout to lock in your requests. No subtotal will be displayed as you are only requesting places, your total will be supplied on the invoice that will be generated at a later date.
Please note once submitted you will not be able to undo this. If you need to change your mind please contact Miss Holly directly who can undo class requests.
Step 14
Once you have completed all of your class submissions, and are interested in using one of the bundles on offer, please navigate to the “Contact Us” tab in the menu on the left.
Step 15
Your reason should be noted as “Bundle Request” with the bundle name and student’s name to be included in the body. This will generate a message directly to me so I can apply this to your invoice prior to generation. You do not need to request the 25% multiple class or sibling discounts as these are automatically done on invoice generation.
You must submit all bundle requests prior to the cutoff time on the “Registrations” page. Requests received after this time may not be applied if your invoice has been generated.

Step 16
Under the “Financials” dropdown you will be able to see your invoices for payment once generated and recipts once marked as paid. Please see the registration page for the countdown to invoice creation.